
Remote Collections Artifacts Using KAPE including UNC and Over the Internet(ZeroTier)
- Feb 9
- 9 min read
Updated: Feb 10

If you’ve been following me, you already know how much of a fan I am of Eric Zimmerman’s tool, KAPE.
I’ve written several articles about it, including IR case studies, and even showed you how to use SentinelOne to run KAPE and collect artifacts from client desktops or transfer them to an SFTP server.
Kape
Sentinel One
But why am I back talking about KAPE again? Well, today, I want to introduce you to a few different ways you can use KAPE to collect artifacts efficiently. So, are you ready? Let’s get started!
----------------------------------------------------------------------------------------------------------
Collecting Artifacts Using UNC Paths
One of the easiest ways to collect artifacts remotely is by using UNC (Universal Naming Convention) paths. This is especially useful for gathering data from systems within a corporate LAN or even over the internet.
What is a UNC Path?
A UNC path is a standardized way of specifying the location of files and folders on a network. Instead of using a drive letter like C:\, a UNC path looks something like this:
\\Artfiact-PC\drive or sharefolderUsing a UNC path, we can map a shared network drive and access it as if it were a local drive. This is super useful when working with KAPE to collect data remotely.
Setting Up a Shared Drive on the Target System
Before we can run KAPE remotely using UNC paths, we need to make sure the target system’s drive is shared. Here’s how to do it:
Go to the target system(From which you want to collect artifact) and open File Explorer.
Right-click on the C: drive and select Properties.

Navigate to the Sharing tab.
Click on Advanced Sharing.
Check the box Share this folder.
Click Permissions and grant Full Control to the necessary users.
Click OK, then Apply, then Close.

At this point, the target’s C: drive is shared, and we can map it on our collection machine.
-------------------------------------------------------------------------------------------------------
Mapping the Shared Drive on the Collection System
Now that the share is ready, let’s map the drive on the machine where we’ll be running KAPE:
Two Methods:-
First using command prompt
Open Command Prompt or PowerShell as an administrator.
Test the network connection to the target machine:
ping <ip> # Replace with the target's IP or desktop name like \\akash\c
Map the shared drive to a local drive letter:
net use G: \\Artifact-PC\C$ /user:DOMAIN\Username
(Replace Artifact-PC with the actual system name or IP.)
G: (Drive letter assigned to share drive)
\\Artifact-PC\C (UNC Path)
/user:DOMAIN\Username example /user:Artifact-PC\Admin
Verify the drive mapping:
net use 
At this point, our target’s C: drive is mapped as G:, and we can use it in KAPE commands just like a local drive.
Second Method:
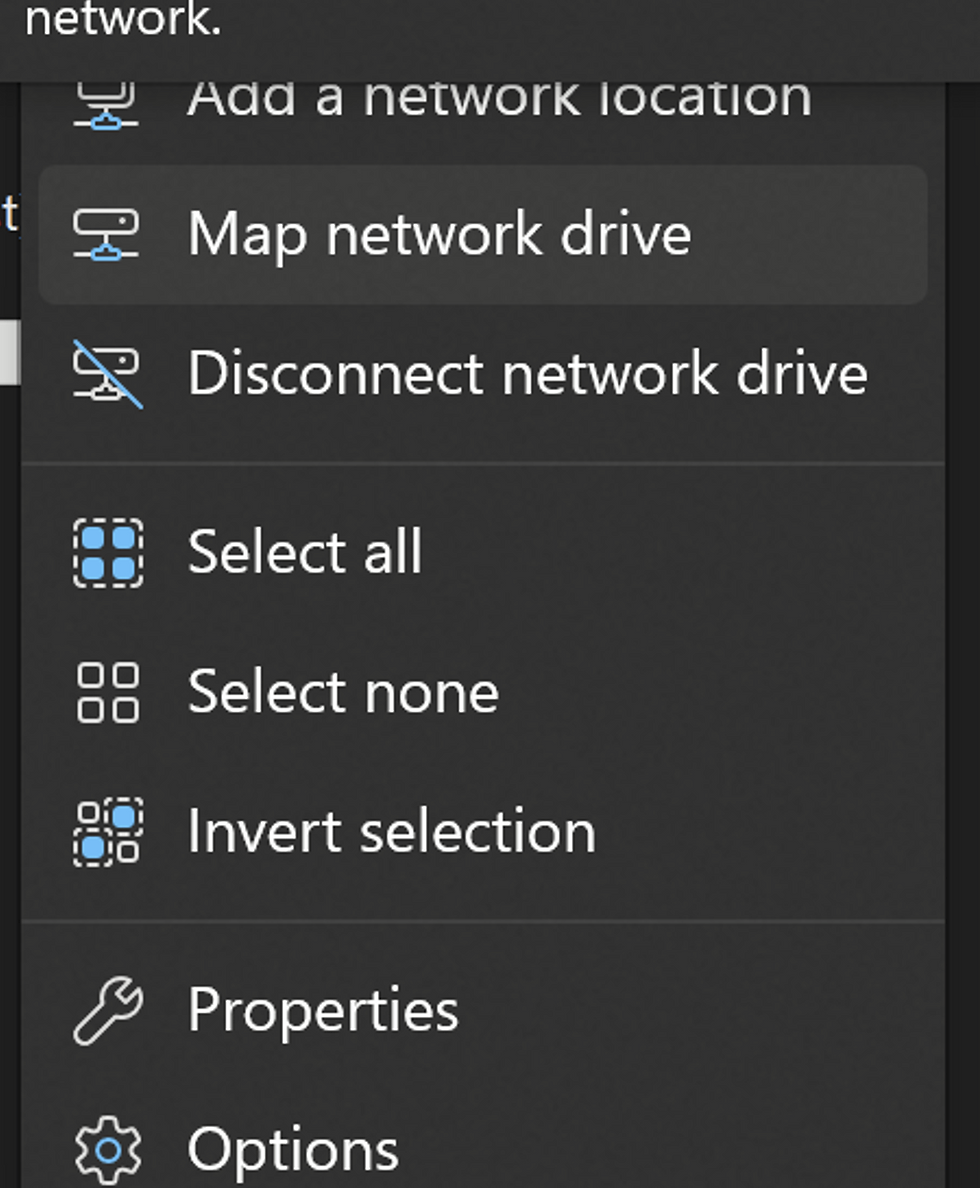
Go on This PC Click on Map Network drive
Add drive letter and check both check boxes (and add login credentials of Artifact machine)
Example Artifact-PC\Admin than password
Once Mapped Output will be like below

To Lean more about this method check the awesome article written below
-------------------------------------------------------------------------------------------------------
Running KAPE with UNC Paths
Now comes the fun part—using KAPE to collect artifacts from the mapped drive.
Basic Command to Collect Artifacts
Once the drive is mapped, running KAPE is straightforward.
Here’s an example command that collects lnk files and jumplist from the remote system:
kape.exe --tsource G:\c --target Lnkfileandjumplists --tdest C:\kape_out\test
                          or
kape.exe --tsource \\Artifact-PC\C  --target Lnkfileandjumplists --tdest C:\kape_out\test
Output: Saves the extracted artifacts to C:\kape_out\test on our local system.


Handling Locked Files & Limitations******
While UNC paths are great, they have some limitations. One major issue is that Windows doesn’t allow raw copying of locked files over UNC paths. For example, if you try to collect locked registry hives, KAPE might defer the copy and fail to retrieve them.
Lets Run command on mapped drive like above:
kape.exe --tsource G:\c --target RegistryHives--tdest C:\kape_out1\test
                          or
kape.exe --tsource \\Artifact-PC\C  --target RegistryHives --tdest C:\kape_out1\test
Output Screenshot(Not supported)

A way:
Use PsExec to run KAPE locally on the remote machine.
Or use Tool like Sentinel One which i have written article link at top
------------------------------------------------------------------------------------------------------------
------------------------------------------------------------------------------------------------------------
Now Question is what is the solution or better way to do it right?
The issue raw copying doesn’t work well with protected system files. So, what if we flip the approach? Instead of pulling files directly, we process them on the target system and only transfer the results. That way, we’re moving clean copies of the files, avoiding direct access issues.
Plus, we’re not actually installing or leaving KAPE on the target system. We execute kape.exe from a shared location on the collection system, keeping our footprint minimal. Sure, there’ll still be execution artifacts—like Prefetch files and some registry entries—but we’re not risking overwriting valuable data in unallocated space. That’s a win.
The Setup
Step 1: Share the KAPE Folder from the Collection System
On your collection system (the machine where you want to store the data), share the folder or complete drive that contains kape.exe.
This is important because we’ll map it as a drive letter on the target system.
Also, create a subfolder within the KAPE folder for storing collected data. This keeps things clean and avoids setting up multiple shares.
Step 2: Map the Shared Folder on the Target
On the target machine, use the net use command to map the shared KAPE folder from the collection system to a drive letter.

This step is basically the reverse of what you’d do if you were sharing the target’s hard drive.
Step 3: Verify the Connection
Check the mapped drive on the target system to confirm the share is working properly.

If all looks good, you’re ready to run KAPE.
Running KAPE to Collect Protected Registry Files
Now, let’s run KAPE directly from the target, but send all collected files straight to the collection system—without touching the target’s disk. Here’s the trick:
Since kape.exe is running from the mapped drive, it doesn’t need to be copied to the target.
Kape.exe --tsource C: --target registryhives --tdest G:\Kape_Out\tdest --vss
The collected data is written over the UNC path to the collection system, not to the target’s local storage.

Even better, we can pull Volume Shadow Copies (VSCs) this way, too.

Output on Collection System

------------------------------------------------------------------------------------------------------------
If you guys remember i spoken of using SFTP(In sentinel One article) Well there is trade off
Watch Out! KAPE Can Write to the Target
While this approach generally keeps things clean, there are cases where KAPE temporarily writes to the target system, even if the final destination is elsewhere. Why? Because certain features—like sending data to an SFTP server or cloud storage—require temporary files before uploading.
For example, if your command includes the --tdest or --mdest option pointing to a local target location, that means KAPE is writing files there first. Here’s an example:
kape.exe --tsource C:\ --tdest C:\Temp\KAPE_Collection --target !SANS_Triage --scs [SERVER] --scp [PORT] --scu [USER] --scpw [PASSWORD] --vhdx What’s Happening Here?
The --tdest option is set to C:\Temp\KAPE_Collection, meaning files are temporarily stored on the target system.
Since we’re using --scs (which creates a VHDX) and then zipping it up, these actions will write to the target.
Once done, the files are sent to an SFTP server.
The Trade-off
Sometimes, we don’t have a choice. The risk of temporary writes is outweighed by the benefit of getting crucial forensic data off the system ASAP. If you can’t take a full forensic image, this might be the best option.
------------------------------------------------------------------------------------------------------------
KAPE Collection Over the Internet Using ZeroTier
Running KAPE from a network share and saving collected data to another network share is a simple but powerful technique. It works great when everything is within the same local network (LAN), but what if we need to collect data from a system across the internet or over a wide-area network (WAN)?
That’s where ZeroTier One comes in. It’s a free, open-source tool that allows us to create a Software-Defined Wide Area Network (SD-WAN) in just a few minutes. This means we can make our remote target system appear as if it’s inside our LAN, making KAPE collection just as easy as if the system were sitting next to us.
Pre-Requisites
ZeroTier Account: This will allow you to create a virtual network for your collection.
ZeroTier installed on both systems: You need to install ZeroTier on both the collection and target systems.
KAPE: The tool you'll use for the data collection. Ensure you have KAPE installed on the collection system.
Step-by-Step Guide
1. Create a ZeroTier Account
To get started, visit ZeroTier and create an account. Once you sign up, you’ll have the ability to create networks.

After signing up, you’ll be taken to your ZeroTier dashboard.
Click on the “Create a Network” button to set up your first virtual network.
This network will enable you to connect multiple systems remotely, even across the internet.
Note down your Network ID, as you'll need it when configuring the client software on your systems.

2. Download and Install ZeroTier on Both Systems
Now that you've created a ZeroTier account, you need to install ZeroTier on both your collection system (where you'll run KAPE) and the target system (from where you'll be collecting the data).
Download ZeroTier: Visit the ZeroTier Downloads page and download the correct version for both systems (Windows, macOS, Linux, etc.).


Install ZeroTier: Run the installer on both systems, accepting all the default settings.
Once installed, you’ll see the ZeroTier icon in the system tray on both systems. You’re now ready to join the network.

3. Join Both Systems to the ZeroTier Network
Right-click the ZeroTier icon in the system tray and click Join Network.
Enter the Network ID that you noted earlier and click Join.
At this point, the system will attempt to connect to the ZeroTier network, but it won’t be fully connected yet.

4. Authorize the Systems in ZeroTier
After both systems have attempted to join the ZeroTier network, you need to authorize them from the ZeroTier management console:
Log into the ZeroTier web console.
Navigate to My Networks and select the network ID you created.
Under the Members section, you'll see a list of systems attempting to join the network.

For each system, check the box next to its Node ID to authorize it to join the network.

Add a label for each system to easily identify which is the Collection System and which is the Target System.
5. Verify Connectivity Between Systems
To ensure that both systems are successfully connected to the ZeroTier network:
Open a Command Prompt (or PowerShell) on one system.
Try to ping the other system using its ZeroTier IP address (visible in the ZeroTier management console).

If the ping is successful, both systems are properly connected
6. Map a Network Drive for Data Collection
Now that both systems are connected via ZeroTier, you can share folders and map drives just like in a local network:
Share a folder/Drive on the collection system (where KAPE is installed) by right-clicking the folder and selecting Properties > Sharing > Share.
On the target system, map a network drive to the shared folder on the collection system:
Open This PC > Map Network Drive.
Enter the path to the shared folder on the collection system (e.g., \\<collection-system-ip>\shared-folder).
Choose a drive letter (e.g., G:) for easy access.
7. Run the KAPE Collection
This runs KAPE on the target but saves the collected data directly to the collection system, ensuring no forensic evidence is overwritten on the remote system.
Here’s an example of the command:
Kape.exe --tsource C: --target registryhives --tdest G:\Kape_Out\tdest --vss
-------------------------------------------------------------------------------------------------------------
you might ask me question: Dean If we can use a UNC path, why do we need a ZeroTier account? Aren’t both similar?
Great question! Let’s break it down and compare these two methods.
Key Differences Between ZeroTier and UNC Paths
a. Network Setup
UNC Path:
Requires direct network access (LAN, VPN, or port forwarding).
Needs firewall and routing configurations (port 445 for SMB).
Security risk if exposed over the internet.
ZeroTier:
No need for port forwarding or complex firewall settings.
Creates a private network automatically, making remote access simple.
Works even if devices are behind firewalls or NAT.
b. Security
UNC Path:
Exposing SMB ports on the internet is a major security risk.
Requires VPN or encryption (SMBv3) to secure remote access.
ZeroTier:
Fully encrypted network traffic by default.
No need to open SMB ports to the internet.
Better access control via ZeroTier’s network management.
c. Flexibility and Remote Access
UNC Path:
Works well within the same network or VPN.
Requires IP/hostname visibility (challenging if behind NAT/firewall).
ZeroTier:
Works globally with no complex VPN setup.
Devices connect as if on the same local network, regardless of location.
No dependency on public IPs or DNS resolutions.
d. Ease of Use
UNC Path:
Standard method for local file sharing but tricky over the internet.
Needs VPN or port forwarding for remote use.
ZeroTier:
Simple to set up – install and connect.
No need for manual routing or firewall changes.
e. Performance
UNC Path:
Performance depends on network setup and VPN overhead.
SMB can suffer from latency issues over long distances.
ZeroTier:
Uses peer-to-peer connections (when possible) for better speed.
Lower latency and more stable performance.
Conclusion: Which One Should You Use?
Use UNC Path when both systems are on the same network or within a well-configured VPN.
Use ZeroTier for secure, seamless, and easy remote access without complex configurations.
Why ZeroTier is the Better Choice for Remote Collections?
✅ No need for port forwarding or VPN setups.
✅ Stronger security with end-to-end encryption.
✅ Works anywhere – even behind firewalls or NAT.
✅ Simpler setup and management compared to UNC paths.
------------------------------------------------------------------------------------------------------------
Wrapping It Up
That’s it! With this setup, you can conduct remote forensic collections using KAPE over the internet without writing any files to the target system.
Want to try it out? Set up a ZeroTier account, spin up a couple of test VMs, and see how smooth it works for yourself.
Happy hunting!
-------------------------------------------Dean---------------------------------------


Comments